
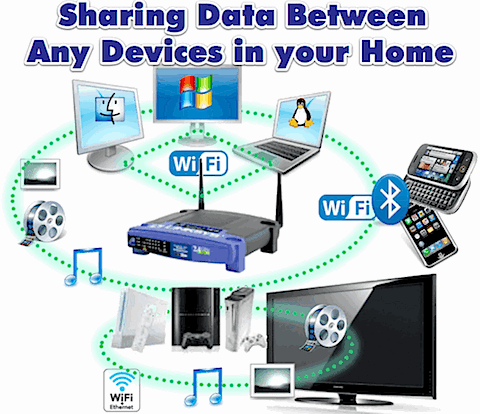
Share Files Between Any Devices in your Home
Learn How to Tie All of your Gadgets Together
You Can Get there from Here
Your home has any number of “connected” devices (Computers, Video Game Consoles, Phones, Portable Media Players, Televisions, DVRs, etc.). Are they all really connected? This three part tutorial series will show you how to connect all of the devices in your house to each other.
I will show you some simple (and some not so simple) steps to get all of your devices singing in perfect harmony including:
- Part 1 – Share Files Between All of your Computers
- Part 2 – Stream Computer Media to the TV using Video Game Consoles
- Part 3 – Sharing Between your Smartphone and Computer
Sharing Files on your Computers
You will learn how to share your files between Windows, Mac, and Linux computers on your home network. Once you have the files on all of your machines shared, you need to connect to them from another machine. You will also learn how to “map” these shared drives so that they are always available, just like your computer’s local Hard Drive or CD/DVD Drive. Share Files Between All of your Computers
Connecting your Computer to your Living Room
You will learn how to stream all of the music, photos, and videos on your computers to your living room using your video game console. There are instructions for Microsoft Xbox 360, Sony PlayStation 3, and Nintendo Wii. You will see how to connect WIndows, Mac, and Linux machines to all three gaming systems. Stream Computer Media to the TV using Video Game Consoles
Connecting your Smartphone to your Computer
You will learn how to stream music, photos, and videos from your computer to your smartphone. You will also learn how to use your smartphone to control your computers and schedule recordings on your DVR. Sharing Between your Smartphone and Computer
5min.com Video of the Day
Wanna make sure that you don’t miss anything?
Get free updates from VitaminCM.com
 Subscribe via RSS Reader
 Subscribe via YouTube
Or just  Follow me on Twitter, where I am constantly sharing great articles written by people WAY smarter than me. Or, see some of the other places where you can connect with me out there in the wilds of the internets.

Bring Excel Data to Life with Conditional Formatting
Learn how to use Microsoft Excel 2007’s advanced conditional formatting features to take your boring data and make it tell a more interesting story.
Updating Multiple Social Media Services Doesn’t Have to Take Forever
Updating Everything at Once Using Pixelpipe
OVERVIEW: You will learn how to use the free service PixelPipe.com to upload files to multiple social media sites from one location.
![]()
Reclaiming Some of your Precious Time
I create a lot of images and videos for the articles on VitaminCM.com. I also am active on a number of Social Media sites like Twitter, Facebook, YouTube, Flickr, etc. When I publish a new article it can take a very long time to upload videos to YouTube, 5min.com, Vimeo, and the rest. It also takes a while to update my status on Twitter, Facebook, Plurk, and FriendFeed. Thankfully, I discovered a way to save a ton of time that I used to spend doing all of these separate tasks.
PixelPipe.com is a free service that allows you to publish photos, videos, audio, files, and status updates to over 100 places at once in just a few seconds. What type of places you ask? How about Flickr, Picasa, Snapfish, Photobucket, and TwitPic for images? You have videos? Try YouTube, Vimeo, Metacafe, Blip.tv, and 12sec. Want to update your status on one of these: Facebook, Twitter, MySpace, FriendFeed, or FourSquare. Do you have a document or note to upload? Try Google Docs, Acrobat.com, Box.net, Drop.io, Evernote, or SlideShare. Did you want to publish a blog post to multiple places? Try Blogger, Wordpress, LiveJournal, and Drupal. These are only a few of the numerous choices in each category. If you’re using a service, it’s there. Trust me.
How PixelPipe Works
Start by signing up for a free account at PixelPipe.com.
![]()
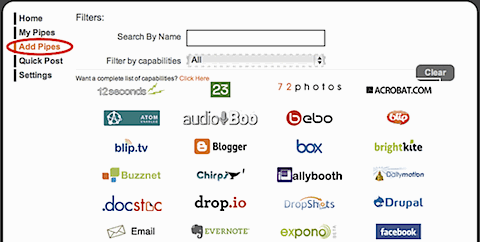
Then, set up your “Pipes“. Pipes are social sites that you want to update from PixelPipe. Here is a full list of services that PixelPipe can update.
Uploading Files via PixelPipe
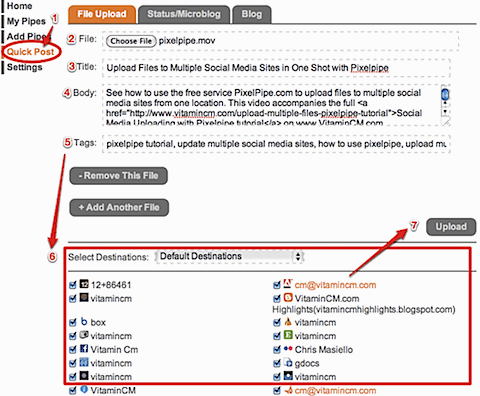
Once you set up your pipes, you are ready to start uploading files. Follow the steps below to upload a file to multiple sites from PixelPipe.
- Select Quick Post
- Choose the file to Upload
- Enter information for File
- Select Services to Upload to
- Click the Upload Button
Updating your Status on Multiple Microblogs
If you want to update your status on sites like Facebook and Twitter in one shot, you can use the Status/Microblog tag of the Quick Post screen.
- Select Quick Post
- Click the Microblog tab
- Type your update in the Status field
- Click the Update Status Button
![]()
Posting an Article to Multiple Blogs at Once
If you want to post an article to multiple blogs, use the Blog tab of the Quick Post menu.
- Select Quick Post
- Click the Blog tab
- Type the title for your post in the Title field
- Type the contents of your update in the Body field
- Click the Make Blog Post Button
![]()
See the Video Tutorial for Uploading Files with PixelPipe
Other Resources
You can get handy applications for your computer or mobile phone right from PixelPipe’s large collection of Free Software.
They also publish news and cool tips on their blog.
Subscribe to VitaminCM.com for Free
Get free updates from VitaminCM.com
Get the VitaminCM.com Podcast
 Subscribe via iTunes
 Friend me on StumbleUpon
 Friend me on Facebook
 Friend me on Digg.com
 Share bookmarks on Delicious
 Share music with me on Last.FM
 Share pictures on Flickr
85 Free Apps that will Save you Thousands of Dollars
Save Tons of Cash with the Best Free Software OVERVIEW: You can replace the most expensive applications on a typical computer with excellent, free software and internet services and never miss a beat. Why Pay More? Equipping your computer with the software that you need to get everything done can be insanely expensive. However, you […]

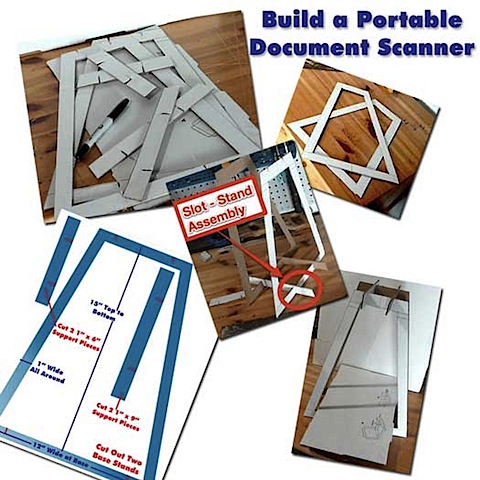
Create a Portable Document Scanner for your iPhone
Getting All of those Scraps into your Computer
Overview: You will learn how to turn your iphone into a portable document scanner for free in under 15 minutes. This will all be done using one piece of cardboard, a ruler, a utility knife and a pencil.
Getting Things Done With Creativity and Elbow Grease
Occasionally I need to get digital copies of papers into my home and/or work computers. I don’t feel like having two full-blown scanners wasting space on my desks, nor do I feel like buying them.
What’s my quick, free, space saving solution? Build a stand that allows me to use my iPhone to make quick images of documents.
I have a few simple requirements for this document scanner:
- Must be able to be assembled quickly and easily
- Muse capture 8.5″ x 11″ documents perfectly (no cropping)
- Must be able to be disassembled, and stored quickly and easily
- Must be cheap (better yet, FREE!)
I searched for a few alternatives and found this really cool option by Kyle Koch.
He sells them for $15 here. This is an awesome idea and $15 is very fair price. But what fun would that be? I decided to try to build my own for free.
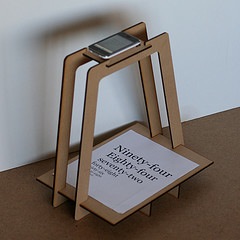
This is my finished prototype:
I place the document on the tray and the phone on the top supports with the camera application running. Then, I just press the “shoot” button and have a decent scan of the document. The key is to have the USB cable plugged in so that you can just grab them using the computer’s file manager. Also, the better the lighting, the happier you’ll be.
With a little bit of practice, I was able to get acceptable results on each documents first try.
Here are some of the document scans that I produced: (scaled down for this article)
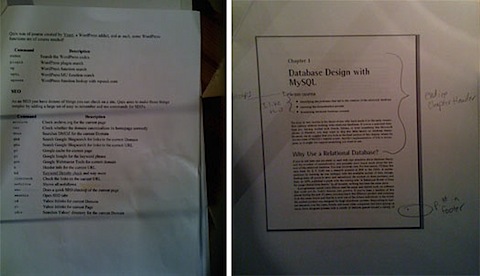
Not bad for $0 and 20 minutes time.
Instructions for Building your iPhone Document Scanner
I know, you want to build yourself one of these handy gadgets, right? Well believe me, it’s very simple.
What you Will Need
Supplies: Utility Knife , Pencil, Ruler or Yardstick
, piece of cardboard (15″ X 30″), scissor.
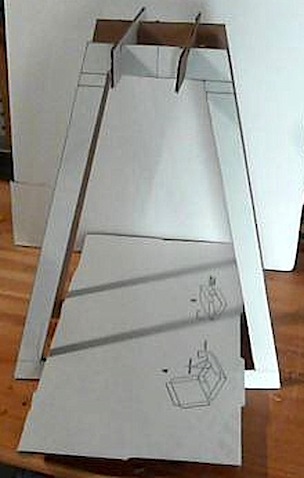
Instructions:
Print out and assemble the Templates diagram
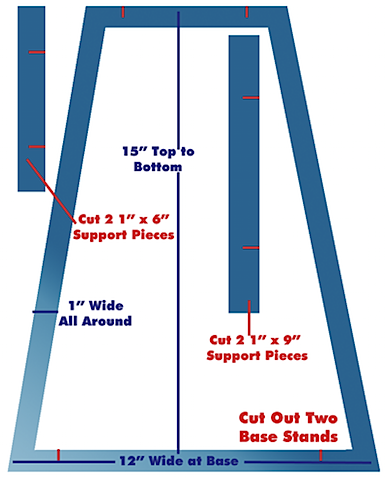
Trace two Stand pieces on the cardboard
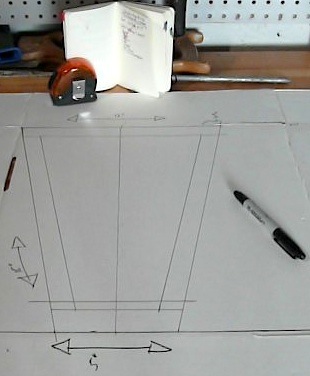
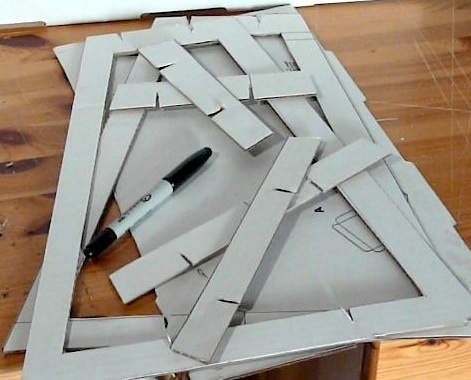
Cut out the Stand pieces using the Yardstick and Utility Knife (be very careful)

Trace and cut out the two Bottom Brackets
Trace and cut out the two Top Brackets
Cut the notches into the Stands and Braces as shown on the diagram
Insert the notches on top and bottom to assemble the Stand

Place the rectangular base into the stand

Place a document on the rectangular base
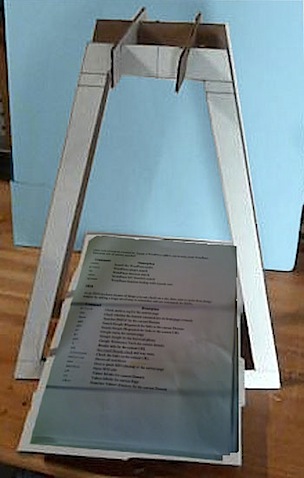
Turn the phone’s camera application on and place it on the top braces so that the document is in the picture
Take the picture.
Portable Document Scanner Video Tutorial
The following video tutorial shows you how to perform all of the steps necessary to make your scanner.
Subscribe to VitaminCM.com for Free
Get free updates from VitaminCM.com