Add Features to a WordPress Blog with Widgets
Make Your Blog Come to Life When you set up your WordPress blog, you select a Theme to control the look and feel of the site. WordPress themes create a sidebar (or two) on the right and/or left side of your screen. You can add further styling, information, and functionality to your site using Widgets. […]
Writing a Blog Aritcle Using the WordPress Web Interface
Now that you have your WordPress Blog installed and configured, you are ready to start writing and publishing articles. WordPress has a web-based interface that allows you to write, edit, and publish articles to your blog.
Configure the Settings on a WordPress Blog (Tutorial)
What to do After You have Installed WordPress
After you install the WordPress software on your web server, there are some configuration steps that you need to take to set your blog up. This tutorial will walk you through some of the basic configuration steps that you should perform from the WordPress Dashboard.
The Dashboard is the web based Administration Console that allows you to control and configure settings for your WordPress blog.
You are going to need to configure the following things on your blog:
- Clean Up the Installation file from your server
- Create the Categories for to group your articles
- Create the Static Pages for your site
- Configure the basic Settings that control certain aspects of how your blog works
Let’s get started!
Cleaning Up your WordPress Installation File
Before you begin configuring any settings, you need to clean up your installation. The file that we ran in the previous tutorial to install the blog (install.php) needs to be deleted from your web server. If this file is ran again, it will completely wipe out your blog and set you back to square one.
Deleting the Install .PHP File from Your Web Server
Perform the following steps:
- Open your FTP Software and connect to your server
- Navigate to the WordPress-Admin folder
- Click on the "install.php" file and delete it.
There are numerous other things that you can and should do to secure your WordPress installation. Here are some good places to get started after you get up and running.
- 11 Ways To Secure Your WordPress Blog – Make Tech Easier
- 9 easy ways to secure your WordPress blog
- How to Secure Your WordPress Blog
Creating Categories to Group your Articles
Categories are used to group and label the articles based on topics. You will need to create the Categories that your articles fit into from the Dashboard.
Click the Posts heading on the right side of the Dashboard page, then the Categories option to open the Category menu.
Populate the Category Name, Category Slug, and Description fields click the Add Category button to create a category.
I recommend creating your list of Categories and their hierarchy and descriptions in a word processor or text editor and then pasting them into the Categories menu. This is a lot quicker and easier than typing it all into the web interface off the top of your head.
The video below shows all of the steps in the process.
Create "Static" Pages
There are certain pages that you will want on your blog. These are not individual articles that each have their own dynamic pages, rather pages that are permanent and don’t get updated (very often). For example, you may want to create a Contact page or an About page that contain information for your readers. These are static pages that are created from the Pages section of the WordPress Dashboard.
Click the Pages heading on the right side of the Dashboard page, then the Add New option to open the Page Creation menu.
Populate the Page Title and Page Body fields and Publish your static page.
The video below shows all of the steps in the process.
Configure the WordPress Settings from the Dashboard
The Settings heading contains may options that allow you to control the way that your WordPress blog looks and functions. You will need to go through all of the Settings options to see which options that you would like to use and how you use them.
The video below shows all of the steps in the process.
Note: Later on, when I cover using Plugins, there will be many more options under the Settings heading. I will discuss these in a subsequent article.
These are the standard configuration settings that you can use to control how your blog functions. In the next article I will go over the use of Themes, Plugins and Widgets, which will extend the functionality of your blog.
Make sure that you don’t miss it…..
Subscribe to VitaminCM.com for Free
Get free updates from VitaminCM.com
Get the VitaminCM.com Podcast
Complete Productivity Series
Be the Most Productive You Possible
Over the last few weeks I have written several articles focused on productivity and organization tips. I thought it might be helpful to create a page that groups, explains, and links to them in an organized manner.
I separated the articles into three general categories:
- Collecting Information
- Scheduling Activities
- Productivity on the Go
Collecting Information
Processing, recording, recalling information is a critical part of being productive and organized. These articles cover effective ways to get a grip on all of the information in your life.
 How You can Take the Greatest Notes in the World
Taking good great notes is probably the best step to being more organized and productive. This article covers my personal technique for taking notes and using them to take action.
 Boost Your Creativity and Productivity by Using a Simple Notebook
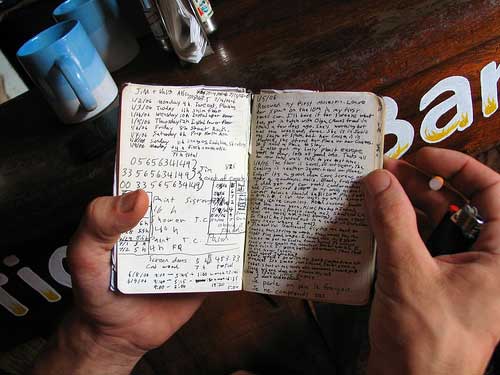
Trying to find ways to capture your creative bursts and brainstorms and use them effectively? One of the greatest tools ever invented is a humble notebook. Most of the creative, successful people that I see use notes as part of their creative process.
 Boost Google Reader’s Productivity
There are a million different sources of information on the web that you need to check every day. Using Google Reader is the best way that I know to take in and process mountains of information in a short amount of time. Check out my favorite tips on squeezing every last drop out of it.
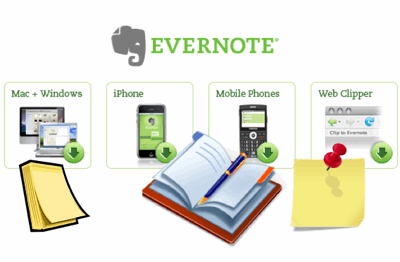 Never Forget Another Idea – Capture Everything with Evernote
If you want to take notes that you can use everywhere on any computer or phone, you need Evernote. This tutorial shows how to use Evernote on Windows, Mac, Linux, phones, and the web. This is one of my favorite productivity applications.
Scheduling Activities
After you capture everything you need, now it’s time to start putting it to work. You need a way to keep track of everything that needs to get done. Here are a few tips to help you get it together.
 Get Things Done with RememberTheMilk
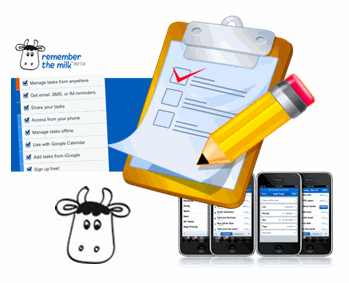
RememberTheMilk is my favorite web based task management tool. You can schedule, track, and manage all of your to do’s from the web or your phone. This is a life saver for the absent minded procrastinator. (I’m talking to you! and me.)
 Getting the Most Out of Mozilla Thunderbird
If you need a tool to handle Email, Contacts, and your Calendar, then give Mozilla’s Thunderbird a shot. I’ll show you how to stretch it beyond even Mozilla’s imagination with some of these extensions.
Productivity on the Go
None of us gets to sit down in an ideal office and handle everything that needs to be done. We’re all on the go these days. Well here are some great ways to take your show on the road without missing a beat.
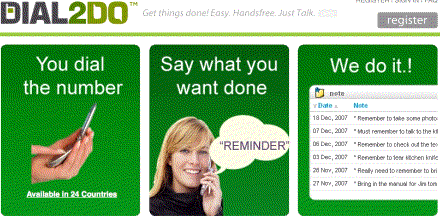 Create a RoboSecretary for Yourself with Dial2Do
This might be my favorite productivity tip in this series. Dial2Do allows you to take all of these productivity systems that I have covered and manage them from your phone. Dial the phone, say what you want done, and it just gets done. If you’re only going to read one article on this page, make it this one!
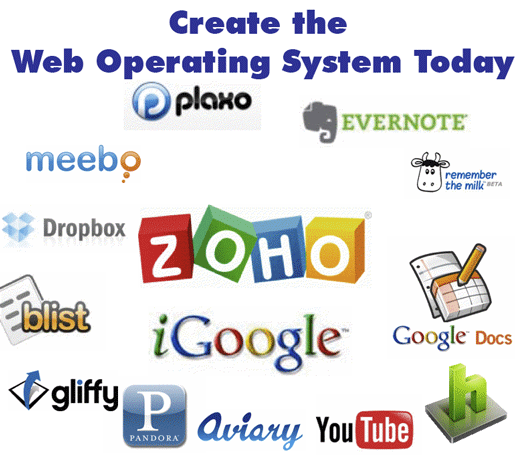 Create the Web Operating System Today
When you’re on the go, you never know what computer that you will be using. This article shows you how to put a full computing experience on the web and access it from any computer in the world.
 Sync Files on Multiple Computers Using DropBox
If you do use multiple computers (work, home, school) you need DrobBox. This will let you sync your most important files between multiple computers with ease. Take a look at this tutorial.
 Carry A Computer in your Pocket
If you insist on using desktop applications, then you should check out this article. You can load a bunch of your favorite applications on a USB drive and use them your way on any other computer.
What do you think?
If you have any other ideas or questions, please put them in the Comments below.
How You can Take the Greatest Notes in the World
Use this Simple Technique to Record, Organize, and Recall Everyting

The information age is upon us. Every day I take in or crank out so much information that it is very difficult to keep it all together. With all of the computers, PDAs, and voice recorders available, I rely on a plain old notebook as my main weapon in the battle to record, create, and organize information. Even though my notebook is simple, my method of taking notes is anything but. I’m going to show you a quick way to go take great notes that will keep you on top of everything.
My Approach to Taking Great Notes
I use a combination of a few approaches modified into my own special method. I base it mostly on the Cornell Note Taking method. Since I’m not a student, I adapted it for taking notes at business meetings and brainstorming projects.
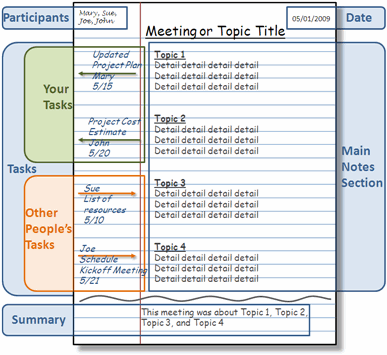
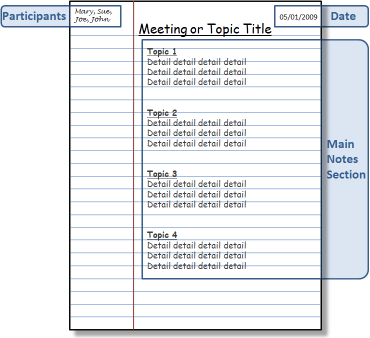
I start out with regular lined notebook paper. I break the page into four sections:
Top
Notes
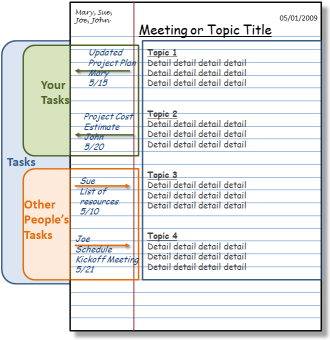
Action Items
Summary
Top Section
In Top the section I write the following:
Top Left – Attendee names (if it’s a meeting)
Top Center – Meeting or Project title
Top Right A – Page Number
Top Right B – Date

Notes Section
I use the main section of the page to taking notes or writing ideas and content.
Action Items
I use the left margin of the page for Action Items. These are typically To-Do’s or Open Questions. If there is a task for me, I draw an arrow pointing out of the Notes section (right to left). Then, I write the task name, recipient (if any), the due date. If it’s a task for someone else I draw an arrow pointing into the Notes section (left to right). Then, I write the responsible person’s name, the task name, recipient (if it’s not me), and the due date.
Summary Section
When the session is over I draw a wavy line below the Notes section. I write a brief one or two line summary at the bottom of the page.

After the Meeting
I also transfer my Action Items to my rolling To-Do list. There are many great ways to record your task list, I love RememberTheMilk. Here is a tutorial showing how use RememberTheMilk to manage your tasks.
Cataloging Notes
Having a notebook full of notes is not very helpful if you can’t find what you need. I always leave a few pages at the back each notebook to create an Index. When I’m done with a meeting I go to the back and write the Page Number, Topic, and Date. This creates a scannable Index that I can use to quickly find notes by topic or date.
Extra Credit
At a lot of meetings that I attend people write and draw important information on flip charts or white boards. At the end of these meetings I usually pull out my phone and grab a decent picture of the information. Then I upload the picture to my Evernote account. Then the picture is available back at my computer before I even get to my desk. Then I print it off and tape the page to the back of the notes from the meeting. Here is a tutorial showing how to use Evernote to capture information anywhere and recall it any time.
Conclusion
This whole process only adds a few seconds onto the basic note taking process, but provides great benefits down the road. When I need to recall something from a project meeting that happened a month ago I just open the Index, find my page and go to the notes. At a moment I can see who was there, when it happened, what was said, and who was responsible for what. That’s certainly worth 45 seconds after an hour long meeting in my opinion.
Here is an article that I wrote about the virtues of taking notes and some of the other cool things that you can do with them.
If you have any other good note taking ideas please add them in the comments section.


 Subscribe to RSS Feed
 Subscribe via Email
 Subscribe via iTunes
 Subscribe via YouTube
 Follow me on Twitter
 Friend me on StumbleUpon
 Friend me on Facebook
 Friend me on Digg.com
 Share bookmarks on Delicious
 Share music with me on Last.FM
 Share pictures on Flickr