Bookmarklets – Add Magical Powers to Your Browser
Learn how to use bookmarklets to get every drop of power out of your favorite browser.
Remote Control Your Computer From The Internet
You can use free, open source software called VNC (Virtual Network Computing) to do just that. VNC software consists of two parts: the Server, which sits on the machine that will be controlled remotely and the Viewer, which another computer uses to control the first machine.
Writing a Blog Aritcle Using the WordPress Web Interface
Now that you have your WordPress Blog installed and configured, you are ready to start writing and publishing articles. WordPress has a web-based interface that allows you to write, edit, and publish articles to your blog.
Configure the Settings on a WordPress Blog (Tutorial)
What to do After You have Installed WordPress

After you install the WordPress software on your web server, there are some configuration steps that you need to take to set your blog up. This tutorial will walk you through some of the basic configuration steps that you should perform from the WordPress Dashboard.
The Dashboard is the web based Administration Console that allows you to control and configure settings for your WordPress blog.
You are going to need to configure the following things on your blog:
- Clean Up the Installation file from your server
- Create the Categories for to group your articles
- Create the Static Pages for your site
- Configure the basic Settings that control certain aspects of how your blog works
Let’s get started!
Cleaning Up your WordPress Installation File
Before you begin configuring any settings, you need to clean up your installation. The file that we ran in the previous tutorial to install the blog (install.php) needs to be deleted from your web server. If this file is ran again, it will completely wipe out your blog and set you back to square one.
Deleting the Install .PHP File from Your Web Server
Perform the following steps:
- Open your FTP Software and connect to your server
- Navigate to the WordPress-Admin folder
- Click on the "install.php" file and delete it.
There are numerous other things that you can and should do to secure your WordPress installation. Here are some good places to get started after you get up and running.
- 11 Ways To Secure Your WordPress Blog – Make Tech Easier
- 9 easy ways to secure your WordPress blog
- How to Secure Your WordPress Blog
Creating Categories to Group your Articles
Categories are used to group and label the articles based on topics. You will need to create the Categories that your articles fit into from the Dashboard.
Click the Posts heading on the right side of the Dashboard page, then the Categories option to open the Category menu.
Populate the Category Name, Category Slug, and Description fields click the Add Category button to create a category.
I recommend creating your list of Categories and their hierarchy and descriptions in a word processor or text editor and then pasting them into the Categories menu. This is a lot quicker and easier than typing it all into the web interface off the top of your head.
The video below shows all of the steps in the process.
Create "Static" Pages
There are certain pages that you will want on your blog. These are not individual articles that each have their own dynamic pages, rather pages that are permanent and don’t get updated (very often). For example, you may want to create a Contact page or an About page that contain information for your readers. These are static pages that are created from the Pages section of the WordPress Dashboard.
Click the Pages heading on the right side of the Dashboard page, then the Add New option to open the Page Creation menu.
Populate the Page Title and Page Body fields and Publish your static page.
The video below shows all of the steps in the process.
Configure the WordPress Settings from the Dashboard
The Settings heading contains may options that allow you to control the way that your WordPress blog looks and functions. You will need to go through all of the Settings options to see which options that you would like to use and how you use them.
The video below shows all of the steps in the process.
Note: Later on, when I cover using Plugins, there will be many more options under the Settings heading. I will discuss these in a subsequent article.
These are the standard configuration settings that you can use to control how your blog functions. In the next article I will go over the use of Themes, Plugins and Widgets, which will extend the functionality of your blog.
Make sure that you don’t miss it…..
Subscribe to VitaminCM.com for Free
Get free updates from VitaminCM.com
Get the VitaminCM.com Podcast
Use RSS to Do More with Internet Data
Part 2 of a Three Part Series on RSS Technology
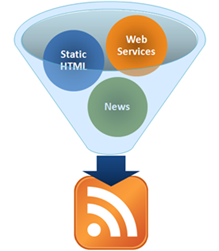
 During Part 1 of the VitaminCM.com series on RSS “Master Online Information Through the Magic of RSS Technology” I covered what RSS is and how it works for sites that provide an RSS feed. RSS can do a lot more than just bring your favorite blog posts to your feed reader. During Part 2, I’m going to show you how to get data out of a web site that does not provide an RSS feed. I’m also going to show you how to use combine multiple sources of data from different web sites and combine it into a single RSS feed.
Using RSS to Get Data from Pages that Don’t Provide an RSS Feed
There is a mountain of valuable data out there on the web that would be great to get sent to your RSS reader. Unfortunately, for a variety of reasons, the sites with the data don’t always provide RSS feeds. Well, fortunately for you, there is a way to get this data sent to you in an RSS feed.
There is a free service called Dapper, which allows you to grab data from web sites and turn it into a dynamic RSS feed. Let’s say you’re looking for a new house. Realtor.com has millions of listings all over the place. It would be great to open up your feed reader every morning and see a listing of the newly listed homes that met your requirements. Too bad this is not available.
With Dapper, you can create just such a feed in a few minutes using the following steps:


 Subscribe to RSS Feed
 Subscribe via Email
 Subscribe via iTunes
 Subscribe via YouTube
 Follow me on Twitter
 Friend me on StumbleUpon
 Friend me on Facebook
 Friend me on Digg.com
 Share bookmarks on Delicious
 Share music with me on Last.FM
 Share pictures on Flickr